Beginners caravanning: changing your caravan wheel in 9 easy steps
Published:
Changing a caravan wheel safely and correctly requires the right tools, preparation, and method, but with practice this procedure can be simple and helpful, especially in an emergency situation.
Here's a full checklist to guide you through it:
What you’ll need:
- Spare wheel
- Jack
- Wheel wrench
- Chocks (optional)
- Torque wrench
- Spreader plate (if required)
Tip: Before setting off on your adventures it’s a useful idea to know where your caravan’s spare wheel is stored, how it’s removed, and that you have the right equipment to remove and replace it if needed.
Step 1: Preparation
Find a safe, flat and solid space, and if you’re roadside use hazard lights and place a warning triangle in a clear spot at least 45 meters (147 feet) behind your vehicle on the same side of the road. Ensure no one is inside the caravan.
Step 2: Secure
Remember to only jack up your caravan when it is coupled up to the car with its handbrake applied and in 1st gear (engine off), this provides a solid anchor and prevents the caravan from rolling or tipping. Lower corner steadies (as a safety measure) on the side that is being jacked up and if you have wheel chocks, put them into position.
Step 3: Wheels
Before you jack up the caravan, remove wheel trims (if you have them fitted) and use a wheel wrench to slightly loosen wheel bolts on the wheel to be changed.
Step 4: Jack up your caravan
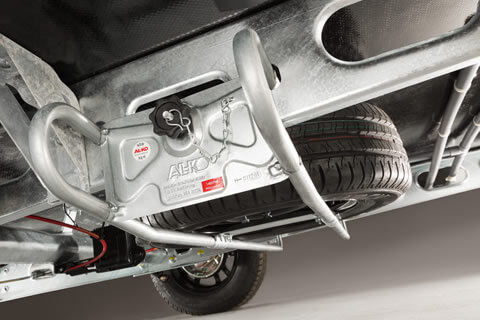
If you have jacking brackets fitted (located just behind the wheel or rear wheel on twin-axle models), wind up the jack until it engages with this bracket and check the jack foot is flat to the floor. Then carefully jack up the caravan until the wheel for removal is just off the ground, remember you may have to lift a little higher to fit the new, fully inflated, spare.
On softer ground, you may need to use a large spreader plate under the jack to prevent it sinking into the ground. If you do not have jacking points you should use a suitable bottle or trolley jack under the axle plate that wraps under the chassis member.
Step 5: Remove wheel
Remove the loosened wheel nuts and remove the wheel.

"If you travel frequently or explore remote areas where breakdown services may not reach you easily or quickly, then knowing how to change a wheel can save hours of waiting. Confidence in your ability to handle a common problem adds to the enjoyment and freedom of caravan travel."
Jo Mitchell, Marketing Director at Swift
Step 6: Fit spare
Ensure the spare wheel is free from damage and distortion before you mount it. Place the spare wheel on the hub whilst simultaneously pushing a wheel bolt through the highest hole into the wheel hub and finger tighten the bolt enough so you can fit a second bolt at the bottom.
Note that the wheel will not fit on the central area on the hub and has to be moved left or right to engage the lower threaded bolt hole on the hub. Fit and hand tighten the bolts on the new wheel in the sequence shown in your handbook, you can gently nip up all bolts but because the caravan is still on the jack, do not overtighten as the caravan could fall from the jack in extreme circumstances.
Step 7: Lower
Slowly lower the caravan back to the ground.
Step 8: Tighten up
Using a suitable wrench, torque all your wheel nuts to the correct setting which are detailed in your caravan handbook, or it can be on the caravan weight plate. Swift caravans are 88Nm (65lb/ft) for steel wheels or 130Nm (96lb/ft) for alloy wheels. Ensure the correct wheel fixings are used, as supplied with your caravan.
Step 9: Check
When lowered, ensure the new tyre is properly inflated and drive slowly at first. When a wheel has been removed and replaced the torque of the wheel nuts should be re-checked after approximately 30 miles.
Related articles

Beginners caravanning: hooking up to electric
Guide - 8 April 2025
Owning a caravan opens up a world of adventure, but before setting off on your first trip, it’s worth getting to grips with some essential basics - one of the first being how to hook up to an electric supply.